HTML Exercises - Forms with Checkboxes
In this set of exercises, we will go through several scenarios of creating HTML forms with checkbox elements. This set of exercises accompanies our Using Checkboxes in an HTML Form article.
Exercises text
1. An HTML form with checkboxes (View the solution)
Create an HTML page that has a form with several, unrelated checkbox controls. Make the first checkbox control selected by default.
2. An HTML form with vertically stacked checkboxes (View the solution)
Create an HTML page that has a form with several, vertically stacked checkbox controls. Wrap all the form's elements in <div> tags.
3. An HTML form with a single group of checkboxes (View the solution)
Create an HTML page that has a form with a single group of checkbox controls. Use the <fieldset> element to create a group of controls.
4. An HTML form with multiple groups of checkboxes (View the solution)
Create an HTML page that has a form with multiple groups of checkbox controls. Use multiple <fieldset> elements to create several groups of controls.
Solutions
1. An HTML form with checkboxes
The index.html file:
<!DOCTYPE html>
<html lang="en">

<head>
    <meta charset="UTF-8">
    <meta name="viewport" content="width=device-width, initial-scale=1.0">
    <title>My Page Title</title>
</head>

<body>
    <form action="some-page" method="post">

        <input type="checkbox" name="my-checkbox-1" value="checkbox-value-1" id="my-checkbox-id-1" checked>
        <label for="my-checkbox-id-1">Checkbox 1</label>

        <input type="checkbox" name="my-checkbox-2" value="checkbox-value-2" id="my-checkbox-id-2">
        <label for="my-checkbox-id-2">Checkbox 2</label>

        <input type="checkbox" name="my-checkbox-3" value="checkbox-value-3" id="my-checkbox-id-3">
        <label for="my-checkbox-id-3">Checkbox 3</label>

        <button>Submit</button>
    </form>
</body>

</html>
Explanation
This HTML page has a form with three checkboxes, three labels, and one Submit button. The form submits the data to some-page route/page using the post method:
<form action="some-page" method="post">
Note: Replace some-page with your form-processing page name (e.g., process-form.php, process-form.aspx and similar).
Each checkbox control is represented through the <input type="checkbox"> element. Each checkbox has name, value, and id attributes along with associated values. The first checkbox is selected by default by having an additional checked attribute:
<input type="checkbox" name="my-checkbox-1" value="checkbox-value-1" id="my-checkbox-id-1" checked>
Each checkbox is associated with the <label> element that provides a caption for the checkbox:
<label for="my-checkbox-id-1">Checkbox 1</label>
Finally, there is a single <button> element that submits the form:
<button>Submit</button>
Optionally, you can also add the type="submit" attribute to the Submit button:
<button type="submit">Submit</button>
Although not required, this attribute explicitly states that the button will be used for submitting the form.
Visually, all the elements on the form appear as inline elements:
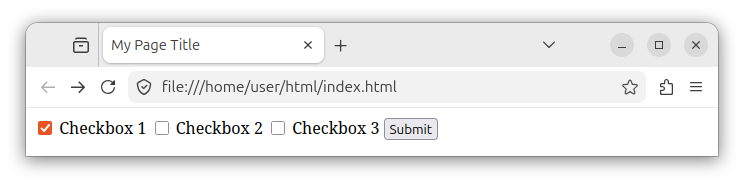
In our second exercise, we will wrap the controls with container elements so that they appear vertically stacked.
Hint: During testing, you can replace the form declaration with the following code:
<form method="get">
And inspect the submitted form's data in the browser's address bar, as multiple name=value pairs.
2. An HTML form with vertically stacked checkboxes
The index2.html file:
<!DOCTYPE html>
<html lang="en">

<head>
    <meta charset="UTF-8">
    <meta name="viewport" content="width=device-width, initial-scale=1.0">
    <title>My Page Title</title>
</head>

<body>
    <form action="some-page" method="post">
        <div>
            <input type="checkbox" name="my-checkbox-1" value="checkbox-value-1" id="my-checkbox-id-1" checked>
            <label for="my-checkbox-id-1">Checkbox 1</label>
        </div>
        <div>
            <input type="checkbox" name="my-checkbox-2" value="checkbox-value-2" id="my-checkbox-id-2">
            <label for="my-checkbox-id-2">Checkbox 2</label>
        </div>
        <div>
            <input type="checkbox" name="my-checkbox-3" value="checkbox-value-3" id="my-checkbox-id-3">
            <label for="my-checkbox-id-3">Checkbox 3</label>
        </div>
        <div>
            <button type="submit">Submit</button>
        </div>
    </form>

</body>

</html>
Explanation
This web page has a form with vertically stacked checkboxes and a Submit button:
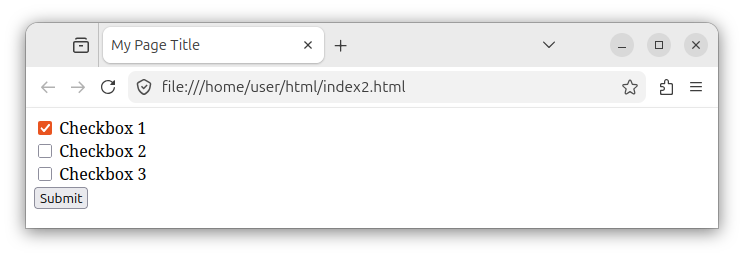
The form has several inner <div> elements which act as containers for the form's elements. In our case, they are containers for checkbox - label pairs, and for the Submit button.
<form action="some-page" method="post">
    <div>
       <!-- Checkboxes and labels -->
    </div>

    <div>
       <!-- Checkboxes and labels -->
    </div>

    <div>
       <!-- Checkboxes and labels -->
    </div>

    <div>
        <button type="submit">Submit</button>
    </div>
</form>
By default, <div> elements are block-level elements, meaning they expand to the full width of their containers. If we have multiple <div> elements, listed one after the other, they (and their content) will appear as vertically stacked elements. If needed, you can also wrap your form elements in a list item (<li>), a fieldset group element (<fieldset>), or some other HTML element.
Note: The role of HTML is to provide the structure, the content, and the semantic meaning for elements on our web page. The elements' positions, sizes, widths, and visual layouts are specified using various CSS rules.
3. An HTML form with a single group of checkboxes
The index3.html file:
<!DOCTYPE html>
<html lang="en">

<head>
    <meta charset="UTF-8">
    <meta name="viewport" content="width=device-width, initial-scale=1.0">
    <title>My Page Title</title>
</head>

<body>
    <form action="some-page" method="post">
        <fieldset>
            <legend>Group 1:</legend>

            <input type="checkbox" name="my-checkbox-1" value="checkbox-value-1" id="my-checkbox-id-1" checked>
            <label for="my-checkbox-id-1">Checkbox 1</label>

            <input type="checkbox" name="my-checkbox-2" value="checkbox-value-2" id="my-checkbox-id-2">
            <label for="my-checkbox-id-2">Checkbox 2</label>

            <input type="checkbox" name="my-checkbox-3" value="checkbox-value-3" id="my-checkbox-id-3">
            <label for="my-checkbox-id-3">Checkbox 3</label>
        </fieldset>

        <button type="submit">Submit</button>
    </form>
</body>

</html>
Explanation
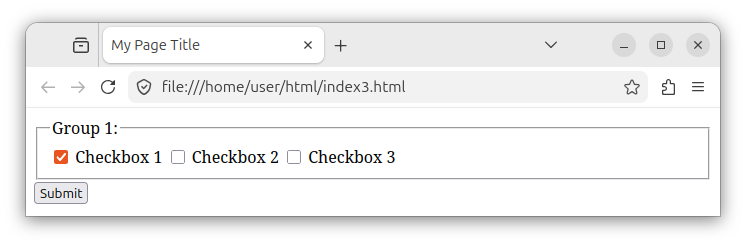
This web page has a form with one group of three checkboxes and associated labels. The group is created using the <fieldset> element, which creates a visual and thematic/logical group for several form fields. The caption text for the <fieldset> group is provided by its <legend> element:
<fieldset>
    <legend>Group 1:</legend>

    <!-- Checkboxes and labels -->

</fieldset>
When rendered in a browser, the fieldset appears as a rectangular area which has a caption and several child fields:
4. An HTML form with multiple groups of checkboxes
The index4.html file:
<!DOCTYPE html>
<html lang="en">

<head>
    <meta charset="UTF-8">
    <meta name="viewport" content="width=device-width, initial-scale=1.0">
    <title>My Page Title</title>
</head>

<body>
    <form action="some-page" method="post">
        <fieldset>
            <legend>Group 1:</legend>

            <input type="checkbox" name="my-checkbox-1-1" value="checkbox-value-1-1" id="my-checkbox-id-1-1" checked>
            <label for="my-checkbox-id-1-1">Checkbox 1.1</label>

            <input type="checkbox" name="my-checkbox-2-1" value="checkbox-value-2-1" id="my-checkbox-id-2-1">
            <label for="my-checkbox-id-2-1">Checkbox 2.1</label>

            <input type="checkbox" name="my-checkbox-3-1" value="checkbox-value-3-1" id="my-checkbox-id-3-1">
            <label for="my-checkbox-id-3-1">Checkbox 3.1</label>
        </fieldset>

        <fieldset>
            <legend>Group 2:</legend>

            <input type="checkbox" name="my-checkbox-12" value="checkbox-value-12" id="my-checkbox-id-12" checked>
            <label for="my-checkbox-id-12">Checkbox 1.2</label>

            <input type="checkbox" name="my-checkbox-22" value="checkbox-value-22" id="my-checkbox-id-22">
            <label for="my-checkbox-id-22">Checkbox 2.2</label>

            <input type="checkbox" name="my-checkbox-32" value="checkbox-value-32" id="my-checkbox-id-32">
            <label for="my-checkbox-id-32">Checkbox 3.2</label>
        </fieldset>

        <button type="submit">Submit</button>
    </form>
</body>

</html>
Explanation
This page has a form that stores two groups of checkboxes and label elements. When rendered in a browser, the above page looks like the following:
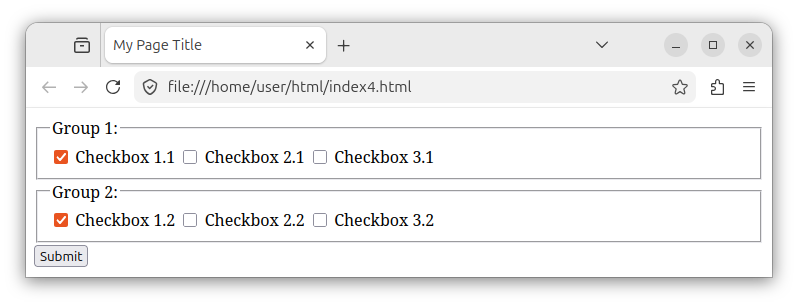
Each group is represented by a separate <fieldset> element:
<fieldset>
    <legend>Group 1:</legend>
    <!-- Checkboxes and label elements -->

</fieldset>

<fieldset>
    <legend>Group 2:</legend>
    <!-- Checkboxes and label elements -->

</fieldset>
The caption for each group is specified in its <legend> child element, and each group holds a set of three checkboxes, and three <label> elements. If needed, other form controls can be grouped this way as well. In summary, we can use several <fieldset> elements to logically and visually group different form elements together, including checkboxes.


