HTML Exercises - Forms with Radio Buttons
In this set of exercises, we will create several HTML pages, each with a different set of radio buttons on a form.
Exercises text
1. A single set of radio buttons (View the solution)
Create an HTML page that has a form with a single set of radio buttons.
2. Two sets of radio buttons (View the solution)
Create an HTML page that has a form with two sets of radio buttons.
Solutions
1. A single set of radio buttons
The index.html file:
<!DOCTYPE html>
<html lang="en">
<head>
    <meta charset="UTF-8">
    <meta name="viewport" content="width=device-width, initial-scale=1.0">
    <title>My Page Title</title>
</head>
<body>
    <h1>Exercise - An HTML Form with Radio Buttons</h1>
    <form action="some-page" method="post">
        <fieldset>
            <legend>Choose an option:</legend>

            <input type="radio" name="my-option-name" id="option-1" value="option-1-value" checked>
            <label for="option-1">Option 1</label>

            <input type="radio" name="my-option-name" id="option-2" value="option-2-value">
            <label for="option-2">Option 2</label>

            <input type="radio" name="my-option-name" id="option-3" value="option-3-value">
            <label for="option-3">Option 3</label>

        </fieldset>

        <button type="submit">Submit</button>
    </form>
</body>
</html>
Explanation
Our HTML page has a form that stores a single collection of three radio buttons. The form submits its data to a some-page destination using the post method:
<form action="some-page" method="post">
In production, replace some-page with your form processing page name.
The radio buttons are grouped together using the <fieldset> element, and the caption for this group is specified inside the fieldset's <legend> child element:
 <fieldset>
    <legend>Choose an option:</legend>
    <!-- Radio buttons and labels -->

</fieldset>
Each radio button has a name, an underlying value, and an id attribute. Each radio button has an associated <label> element which provides a caption for that radio button. The first radio button is checked by default by providing the checked attribute:
<input type="radio" name="my-option-name" id="option-1" value="option-1-value" checked>
<label for="option-1">Option 1</label>

<!-- Other radio buttons and labels -->
All radio buttons share the same name, which allows us to select only one radio button within a group of radio buttons.
Currently, radio buttons and labels are visually inlined in our form:
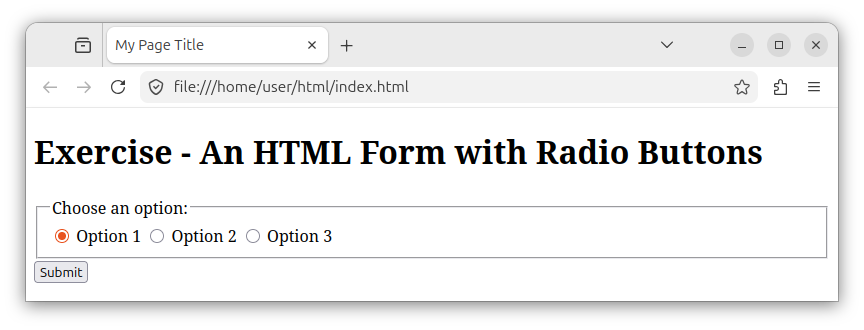
If you want to stack them vertically, you can wrap individual radio buttons and their labels with a <div> element. Example:
<fieldset>
    <legend>Choose an option:</legend>
    <div>
        <input type="radio" name="my-option-name" id="option-1" value="option-1-value" checked>
        <label for="option-1">Option 1</label>
    </div>
    <div>
        <input type="radio" name="my-option-name" id="option-2" value="option-2-value">
        <label for="option-2">Option 2</label>
    </div>
    <div>
        <input type="radio" name="my-option-name" id="option-3" value="option-3-value">
        <label for="option-3">Option 3</label>
    </div>
</fieldset>

<!-- Other form controls -->
Now, the elements on our form are visually stacked vertically:
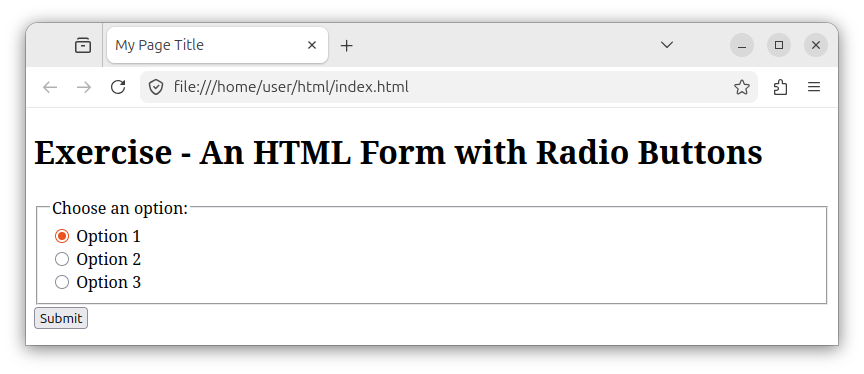
2. Two sets of radio buttons
The index.html file:
<!DOCTYPE html>
<html lang="en">
<head>
    <meta charset="UTF-8">
    <meta name="viewport" content="width=device-width, initial-scale=1.0">
    <title>My Page Title</title>
</head>
<body>
    <h1>Exercise - A Form with Two Sets of Radio Buttons</h1>
    <form action="some-page" method="post">
        <fieldset>
            <legend>Options group 1:</legend>

            <input type="radio" name="options-group-1" id="option-1-1" value="option-1-1-value" checked>
            <label for="option-1-1">Option 1.1</label>

            <input type="radio" name="options-group-1" id="option-2-1" value="option-2-1-value">
            <label for="option-2-1">Option 2.1</label>

            <input type="radio" name="options-group-1" id="option-3-1" value="option-3-1-value">
            <label for="option-3-1">Option 3.1</label>
        </fieldset>

        <fieldset>
            <legend>Options group 2:</legend>

            <input type="radio" name="options-group-2" id="option-1-2" value="option-1-2-value" checked>
            <label for="option-1-2">Option 1.2</label>

            <input type="radio" name="options-group-2" id="option-2-2" value="option-2-2-value">
            <label for="option-2-2">Option 2.2</label>

            <input type="radio" name="options-group-2" id="option-3-2" value="option-3-2-value">
            <label for="option-3-2">Option 3.2</label>
        </fieldset>

        <button type="submit">Submit</button>
    </form>
</body>
</html>
Explanation
Our HTML page now has a form that stores two sets of radio buttons:
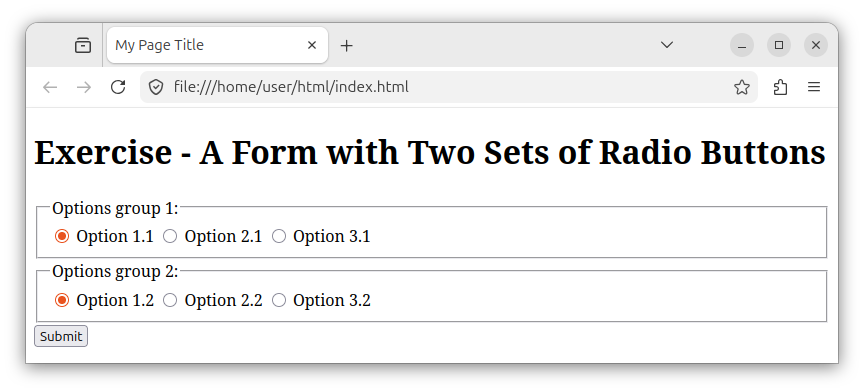
Each set is represented through a <fieldset> element. The title for each fieldset is specified using its child <legend> element:
<form action="some-page" method="post">
    <!-- The first set: -->
    <fieldset>
        <legend>Options group 1:</legend>
        <!-- Radio buttons and label elements here -->

    </fieldset>

    <!-- The second set: -->
    <fieldset>
        <legend>Options group 2:</legend>
        <!-- Radio buttons and label elements here -->

    </fieldset>

    <button type="submit">Submit</button>
</form>
In the first fieldset, we have the first batch of three radio buttons and associated labels. The first radio button inside the first set is checked by default:
<fieldset>
    <legend>Options group 1:</legend>

    <input type="radio" name="options-group-1" id="option-1-1" value="option-1-1-value" checked>
    <label for="option-1-1">Option 1.1</label>

    <input type="radio" name="options-group-1" id="option-2-1" value="option-2-1-value">
    <label for="option-2-1">Option 2.1</label>

    <input type="radio" name="options-group-1" id="option-3-1" value="option-3-1-value">
    <label for="option-3-1">Option 3.1</label>
</fieldset>
All buttons within this fieldset have the same name.
The same process repeats for the second batch of radio buttons, positioned in the second <fieldset> group:
<fieldset>
    <legend>Options group 2:</legend>

    <input type="radio" name="options-group-2" id="option-1-2" value="option-1-2-value" checked>
    <label for="option-1-2">Option 1.2</label>

    <input type="radio" name="options-group-2" id="option-2-2" value="option-2-2-value">
    <label for="option-2-2">Option 2.2</label>

    <input type="radio" name="options-group-2" id="option-3-2" value="option-3-2-value">
    <label for="option-3-2">Option 3.2</label>
</fieldset>
All radio buttons within this group share the same name, and the first radio button in this group is checked by default.
Radio buttons within this group have their own id and value attribute values, which are different from the ones in the first group. This allows us to easily process and check which radio button was selected when we submit the form.
Inspecting the submitted data
In production, we usually submit the form's data using the post method. However, during testing, to quickly inspect the submitted data, we can replace the form's signature from:
<form action="some-page" method="post">
To:
<form method="get">
And see all the submitted name=value pairs in the browser's address bar.


