HTML Overview
HTML or HyperText Markup Language is a language that describes the structure and content of a web page or an HTML document. A web page that consists of some HTML code is also referred to as an HTML page, HTML document, or HTML code.
We also say that a web page (an HTML document) consists of multiple HTML elements, placed in a certain order.
Introduction
When we access a URL such as https://www.example.com in a browser, we are sending a request to the server. The server receives the requests and sends a response containing the HTML code for that page. Our web browser receives the HTML code, parses it, and displays (renders) the content of that page.
An HTML document/code on the server can be:
- Dynamically generated by a script.
- Placed in static text files with the .html extension.
To follow this tutorial, on our local machine, we will create a regular text file called index.html, and we will place all our HTML code into that file. Finally, we will open and display the index.html file in a web browser.
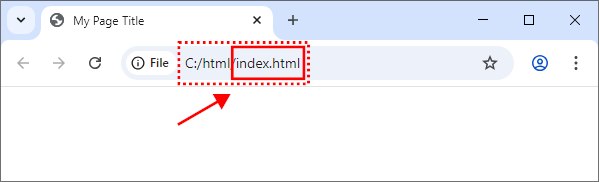
The following image shows an index.html file opened in a Chrome web browser on Windows:
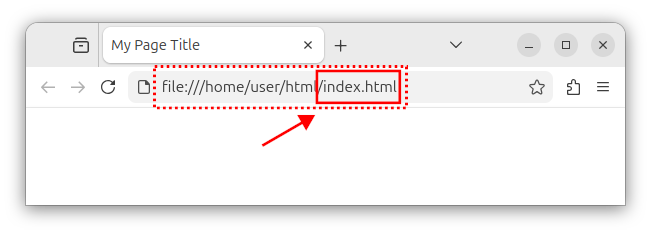
The following image shows an index.html file opened in a Firefox web browser on Linux:
HTML editor
To create and edit HTML files, we can use any text editor of our choice. We can also download and install a Visual Studio Code free text editor. Visual Studio Code is a popular choice for creating and editing HTML files.
HTML elements
An HTML document consists of multiple HTML elements. Different elements represent different entities on a page. For example, one element represents a page title, another element represents a paragraph, some other element represents a picture and so on.
An HTML element consists of an opening tag, a content and a closing tag. The general syntax for an HTML element is:
<tag_name>Content</tag_name>
Tags
An opening tag consists of a predefined tag name, surrounded by angled brackets:
<tag_name>
The element's content is the text that follows the opening tag and precedes the closing tag:
The content of the element
A closing tag is a predefined tag name surrounded by angled brackets and preceded with a forward slash:
</tag_name>.
Finally, the entire HTML element has the following syntax:
<tag_name>The content of the element</tag_name>
In an actual HTML document, the tag_name wording will be replaced by actual predefined tag names such as h1 for headings, p for paragraphs and so on. We will cover all of these in greater detail later in this course.
Important: Each opening tag should be followed by a content and a closing tag. Do not forget to close your tags.
The terms element and tags are often used interchangeably.
Self-closing tags
Some HTML elements (such as <img>, <hr> and others) use self-closing tags and do not require the closing tag. The general syntax for such elements is:
<tag_name attributes and content>
Elements placement
An HTML document can have multiple elements listed one after the other:
<tag_name_1>The content of the first element</tag_name_1>
<tag_name_2>The content of the second element</tag_name_2>
Use-case: An HTML page can have a title, followed by a paragraph, followed by an image and so on.
HTML elements can also be placed/nested inside other elements:
<outer_element>The parent element's content
    <inner_element>The nested (child) element's content</inner_element>
</outer_element>
The above code shows an outer (parent) element and an inner (child) element nested inside the outer/parent element. In this case, the outer element has its own content, plus the whole inner element as its additional content.
This version:
<outer_element>
    <inner_element>The nested element's content.</inner_element>
</outer_element>
Uses the nested element as the parent element's main and only content.
These children elements are called nested HTML elements or inner HTML elements. Here the inner_element element is nested inside the outer_element element. The outer_element is a parent element or the wrapper element, and the inner_element element is a child element. This way, we provide a hierarchical structure that allows us to organize and group elements together in our HTML document.
In HTML code, nested (inner) elements are usually indented by one tab character, two spaces or four spaces. Pseudo-code example:
<outer_element>
    <inner_element>
        <!-- Inner element's content -->
    </inner_element>
<outer_element>
If a wrapper element has multiple children elements, each child element is usually indented by the same amount:
<outer_element>
    <inner_element_1>
        <!-- Inner element's content -->
    </inner_element_1>

    <inner_element_2>
        <!-- Inner element's content -->
    </inner_element_2>
<outer_element>
Use-cases: An HTML page can have a paragraph, and within that paragraph, there can be a link to another page. A page can have a top bar, a sidebar and a main content section on our page. And each section holds its own nested elements.
Attributes
An element can have attributes. Attributes specify the element's configuration and behavior. Attributes consist of a predefined attribute name and an attribute value, usually surrounded with double quotes. The general syntax for an attribute and its associated value is:
attribute_name="some attribute value"
The attribute is placed in an opening tag using the following syntax:
<tag_name attribute_name="some attribute value">The element's content</tag_name>
To specify an element with a single attribute, we use the following, general syntax:
<tag_name attribute_name="some attribute value">The element's content</tag_name>
To specify an element with multiple attributes, we separate multiple attribute's name="value" pairs with spaces:
<tag_name attribute_name_1="value 1" attribute_name_2="value 2">The element's content</tag_name>
To specify an attribute for a self-closing element, we place the attribute's "name=some-value" name/value pair after the tag name:
<self-closing-tag_name attribute_name="some-value">
Attributes use-cases
As we progress through this tutorial, we will cover various attributes that are both global and unique to particular element. For now, let us briefly mention only some use-cases upfront:
We can use attributes to uniquely identify an element with an id attribute:
<tag_name id="some-unique-value">The element's content</tag_name>
We can use an attribute to assign a CSS class rule to an element:
<tag_name class="some-css-class">The element's content</tag_name>
In this course, we will also see how attributes are essential for specifying various metadata values for our page, setting the link URL, and image source and more. For now, it is important to get a high-level overview of what attributes are and how they are used.
Comments
HTML documents can also have comments. Comments start with a <!-- string, followed by a comment text, and they end with a --> string. Example:
<!-- This is an HTML comment. -->
Comments can be used as notes to other developers or to document the parts of the HTML code. Comments are not displayed on a rendered page, but are visible in the source code.
Inspecting the document's HTML source code in a browser
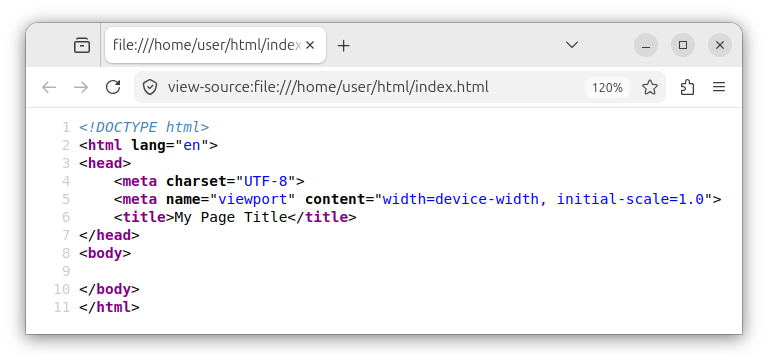
To view the document's HTML source code in a web browser, right click on a page and choose the View page source option, or press CTRL + U on the keyboard.
Summary
In this article, we provided a basic overview of an HTML markup language, its elements, tags and attributes.
In our next tutorial, we will explain the basic HTML document structure.


