Using Checkboxes in an HTML Form
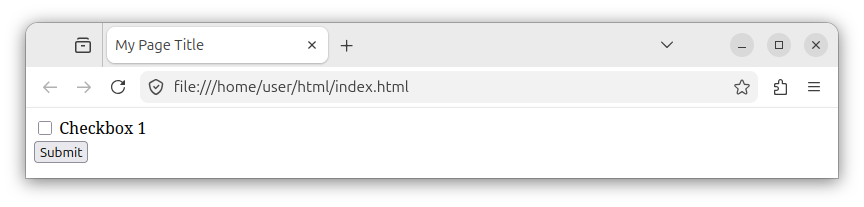
Checkboxes are rectangular input controls that can be checked/ticked or unchecked/unticked before submitting the form. Checkboxes can have underlying values and associated labels. The following image shows a form with a single checkbox:
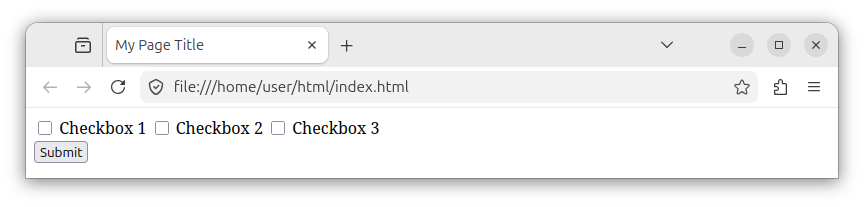
This image shows a web page whose form has multiple checkboxes:
To create a single checkbox control in our HTML form, we use the <input> element with its type attribute set to the value "checkbox". The general syntax is:
<form>
    <input type="checkbox">
    <!-- Other controls -->
</form>
Important checkbox attributes
The checkbox control usually has the following attributes:
- The
nameattribute. - The
valueattribute. - Other optional attributes such as
id,checked, andrequiredattributes.
The name and value attributes
The checkbox should always have name and value attributes, as those attributes are submitted when we submit the form:
<input type="checkbox" name="my-checkbox" value="my-value">
The above checkbox control has a name of my-checkbox and a value of my-value. When we submit a form, the my-checkbox=my-value pair will be sent (submitted) to a server.
The id attribute
The checkbox control usually has an id attribute with a unique value. The id attribute uniquely identifies the control on our page:
<input type="checkbox" name="my-checkbox" value="my-value" id="my-id">
And allows us to:
- Set the caption for a checkbox using the
<label>element. - Manipulate the checkbox in JavaScript.
- Style the checkbox using the CSS ID selector.
The required attribute
If the value of a checkbox is required when submitting the form, we add the required attribute to our checkbox:
<input type="checkbox" name="my-checkbox" value="my-value" id="my-id" required>
Associating a label with a checkbox
To set the label/caption for a checkbox, we use the <label> element:
<input type="checkbox" name="my-checkbox" value="my-value" id="my-id">
<label for="my-id">Checkbox 1</label>
The <label> element gets associated with the checkbox by setting the label's for attribute to the value of the checkbox's id attribute. Inside the <label> element, we specify the caption text for our checkbox.
Usually, we place the checkbox control before the label element in our source code. This ensures the checkbox control is rendered first, and the caption text is rendered second.
A form with a single checkbox
The following index.html source code shows a page holding a form with a single checkbox control, an associated label control, and a Submit button:
<!DOCTYPE html>
<html lang="en">
<head>
    <meta charset="UTF-8">
    <meta name="viewport" content="width=device-width, initial-scale=1.0">
    <title>My Page Title</title>
</head>
<body>
    <form action="some-page" method="post">
        <input type="checkbox" name="my-checkbox" value="my-value" id="my-id">
        <label for="my-id">Checkbox</label>
        <br>
        <button>Submit</button>
    </form>
</body>
</html>
When this form is submitted, the checkbox's name/value pair will be submitted. In our case, it is the my-checkbox=my-value pair that gets submitted.
Note: Replace some-page with your form-processing page name.
Note: For the sake of simplicity, we used the <br> element to introduce line breaks in our form. In production, you can wrap the form controls with <div> elements instead. Example:
<form action="some-page" method="post">
    <div>
        <input type="checkbox" name="my-checkbox" value="my-value" id="my-id">
        <label for="my-id">Checkbox</label>
    </div>

    <div>
        <button>Submit</button>
    </div>
</form>
Checked and unchecked states
The checkbox control is rendered as a square area that can be either checked (ticked) or unchecked before submitting the form.
- If the checkbox control is checked, and we submit the form, the name and value of this checkbox will be submitted to the form-handling page.
- If the checkbox control is not checked, and we submit the form, the checkbox's data will not be submitted to the form-handling page. No
my-checkboxname and nomy-valuevalue attributes of this checkbox will be submitted in that case.
If we forget to explicitly specify the value attribute for a checkbox as in:
<input type="checkbox" name="my-checkbox" id="my-id">
Then, the checkbox will have the default value of on. Instead of relying on this default value, we should explicitly set our checkbox's value attribute to some specific value. Example:
<input type="checkbox" name="my-checkbox" value="my-value" id="my-id">
Checked by default
If the checkbox needs to be checked by default, we add the checked attribute to our checkbox element. Example:
<input type="checkbox" name="my-checkbox" value="my-value" id="my-id" checked>
Multiple Checkboxes
Our form can have multiple checkboxes, and they can belong to some logical group or stand on their own. To include multiple unrelated checkboxes on our form, we simply list them one after the other and give them separate names. Example:
<form action="some-page" method="post">
    <input type="checkbox" name="my-checkbox-1" value="my-value-1" id="my-id-1">
    <label for="my-id-1">Checkbox 1</label>

    <input type="checkbox" name="my-checkbox-2" value="my-value-2" id="my-id-2">
    <label for="my-id-2">Checkbox 2</label>

    <input type="checkbox" name="my-checkbox-3" value="my-value-3" id="my-id-3">
    <label for="my-id-3">Checkbox 3</label>

    <br>
    <button>Submit</button>
</form>
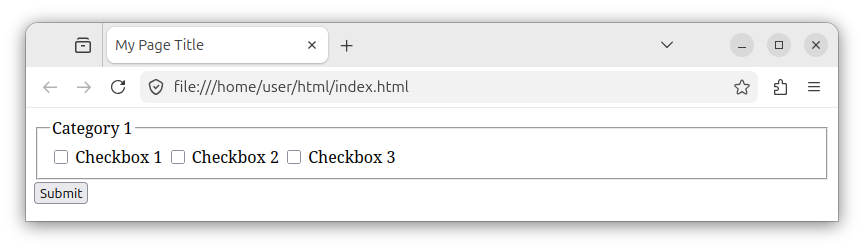
To create multiple checkboxes that belong to the same, logical category, we can wrap them with the <fieldset> element. The following example shows a form with three checkboxes grouped together using the <fieldset> element:
<form action="some-page" method="post">
    <fieldset>
        <legend>Category 1</legend>
        <input type="checkbox" name="my-checkbox-1" value="my-value-1" id="my-id-1">
        <label for="my-id-1">Checkbox 1</label>

        <input type="checkbox" name="my-checkbox-2" value="my-value-2" id="my-id-2">
        <label for="my-id-2">Checkbox 2</label>

        <input type="checkbox" name="my-checkbox-3" value="my-value-3" id="my-id-3">
        <label for="my-id-3">Checkbox 3</label>
    </fieldset>

    <button>Submit</button>
</form>
The fieldset element is used to create a group of several, related form controls. The caption of the fieldset is set by its child <legend> element. In our case, a fieldset element represents a collection of related checkboxes and their associated labels.
When rendered in a browser, the fieldset acting as a container for several checkboxes and other controls looks like a captioned, rectangular area housing several controls:
If all checkboxes belong to some same logical group, they can share the same name and all of them will still be submitted. For example, the following code snippet shows a group of checkboxes sharing the same name of my-checkboxes:
<form action="some-page" method="post">
    <fieldset>
        <legend>Category 1</legend>
        <input type="checkbox" name="my-checkboxes" value="my-value-1" id="my-id-1">
        <label for="my-id-1">Checkbox 1</label>

        <input type="checkbox" name="my-checkboxes" value="my-value-2" id="my-id-2">
        <label for="my-id-2">Checkbox 2</label>

        <input type="checkbox" name="my-checkboxes" value="my-value-3" id="my-id-3">
        <label for="my-id-3">Checkbox 3</label>
    </fieldset>

    <button>Submit</button>
</form>
Unlike radio buttons with the same name, where only one radio button can be selected, checkboxes sharing the same name can all be selected and all of them will be submitted. Sometimes, developers like to add the [] string at the end of the name for all checkboxes, as a signal to the processing script that an array of values will be submitted.
Still, in production, it might prove easier to simply provide different names for all the checkboxes, even if they are related and belong to the same group/fieldset:
<form action="some-page" method="post">
    <fieldset>
        <legend>Category 1</legend>
        <input type="checkbox" name="cat-1-checkbox-1" value="my-value-1" id="my-id-1">
        <label for="my-id-1">Checkbox 1</label>

        <input type="checkbox" name="cat-1-checkbox-2" value="my-value-2" id="my-id-2">
        <label for="my-id-2">Checkbox 2</label>

        <input type="checkbox" name="cat-1-checkbox-3" value="my-value-3" id="my-id-3">
        <label for="my-id-3">Checkbox 3</label>
    </fieldset>

    <br>
    <button>Submit</button>
</form>


