Laravel Authentication Tutorial
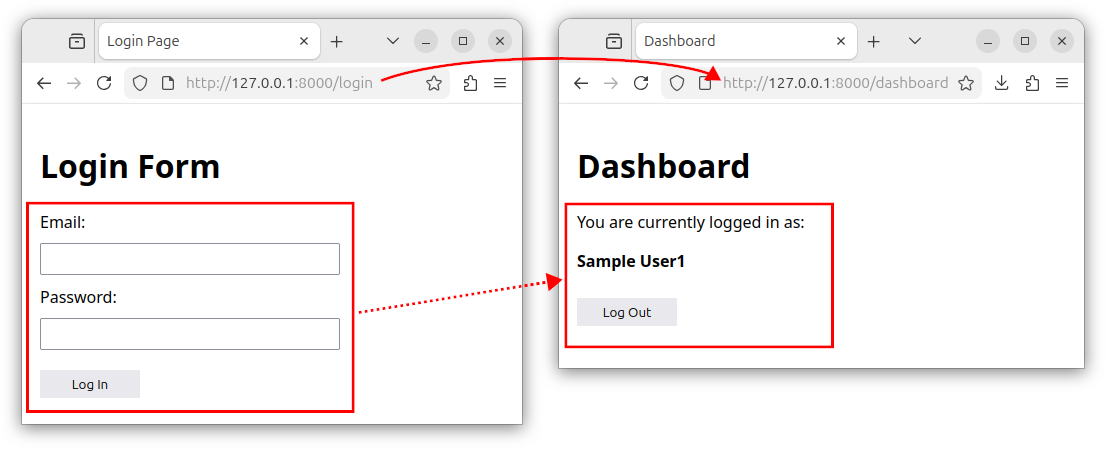
In this tutorial, we will learn how to log a user in, log them out and perform authentication checks in Laravel.
Overview
Laravel provides ready-made facilities for performing authentication tasks. By default, the framework will try to authenticate the users from the default users table.
Let us insert a new user record into the existing users table. Start a Tinker tool in the terminal:
php artisan tinker
Insert a new user:
App\Models\User::create([
    'name' => 'Sample User1',
    'email' => 'user1@example.com',
    'password' => Hash::make('pass1'),
]);
And exit the Tinker:
quit
Now, our users table has a new user whose email is user1@example.com and whose password is pass1. We will try to authenticate this user later, using these credentials.
Creating views
In this section, we will create a login page and a dashboard page.
Creating the login page
To create a view that displays a login form, in the terminal, we write:
php artisan make:view login
Open the newly created login.blade.php file and paste the following HTML code:
<!DOCTYPE html>
<html lang="en">
<head>
    <meta charset="UTF-8">
    <meta name="viewport" content="width=device-width, initial-scale=1.0">
    <title>Login Page</title>
    <style>
        body { font-family: sans-serif; padding: 10px; display: flex; flex-direction: column; }
        form { max-width: 300px; display: flex; flex-direction: column; gap: 10px; }
        input, button { padding: 6px; }
        button { margin-top: 10px; border: none; cursor: pointer; width: 100px; }
        .error { max-width: 300px; background-color: #f6cfd2; color: #7f1f27; padding: 10px; margin-bottom: 10px; }
    </style>
</head>
<body>
    <h1>Login Form</h1>

    @error('login-error')
    <div class="error">
        <p>{{ $message }}</p>
    </div>
    @enderror

    <form action="/login" method="POST">
        @csrf
        <label for="email">Email:</label>
        <input type="email" id="email" name="email" value="{{ old('email') }}" required>

        <label for="password">Password:</label>
        <input type="password" id="password" name="password" required>

        <button type="submit">Log In</button>
    </form>
</body>
</html>
This simple HTML page will be used to display a login form with email and password fields:
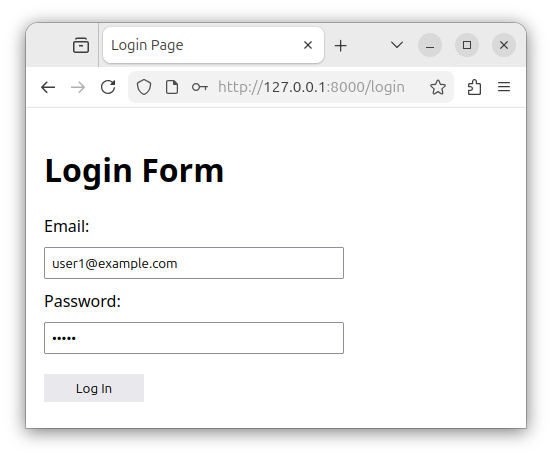
The form also includes the @csrf Blade directive to prevent the cross-site request forgery attacks. Once submitted, the form sends a POST request to the /login route.
Creating the dashboard page
To create a simple dashboard page for the authenticated users only, in the terminal, we execute:
php artisan make:view dashboard
Open the dashboard.blade.php file and paste the following HTML code:
<!DOCTYPE html>
<html lang="en">
<head>
    <meta charset="UTF-8">
    <meta name="viewport" content="width=device-width, initial-scale=1.0">
    <title>Dashboard</title>
    <style>
        body { font-family: sans-serif; padding: 10px; }
        button { margin-top: 10px; padding: 6px; border: none; cursor: pointer; width: 100px; }
    </style>

</head>
<body>

    <h1>Dashboard</h1>
    @auth
    <p>You are currently logged in as:</p>
    <p><strong>{{ auth()->user()->name }}</strong></p>
    <form method="POST" action="/logout">
        @csrf
    <button type="submit">Log Out</button>
    @endauth

</form>

</body>
</html>
Explanation
This code displays an HTML page for the authenticated user.
Inside the page, we can also use the @auth ... @endauth code block to conditionally display the HTML code only to the logged in / authenticated users. If the user is not authenticated, the code inside the @auth ... @endauth block will not be displayed on the page:
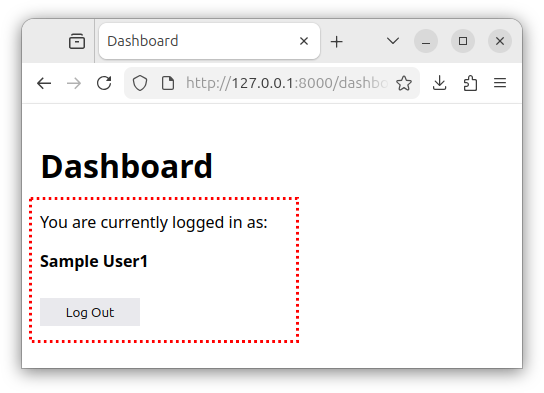
To access the authenticated user in our Blade template, we can use the auth()->user() helper function. To print the authenticated user's name column, we use the auth()->user()->name expression inside the Blade echo statement, so it becomes: {{ auth()->user()->name }}:
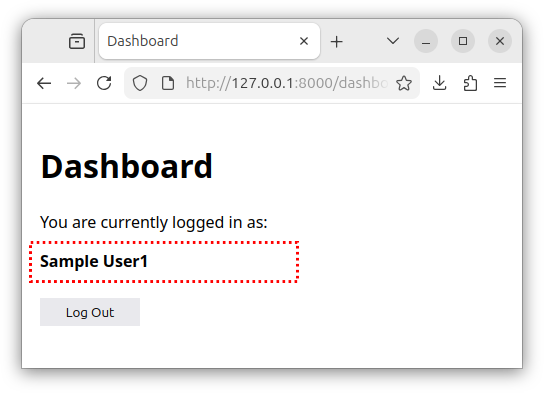
To access the authenticated user's email value/column, we would use the auth()->user()->email expression.
Creating the AuthController controller
Let us create the controller class for handling the login tasks, and name it AuthController. This controller class will be used to display the login page, log a user in, and log a user out. In the terminal, we execute:
php artisan make:controller AuthController
Open the AuthController.php file and paste the following code:
<?php

namespace App\Http\Controllers;

use Illuminate\Http\Request;
use Illuminate\Support\Facades\Auth;

class AuthController extends Controller
{

    public function showLoginForm()
    {
        // display the login page
        return view('login');
    }

    public function authenticate(Request $request)
    {
        // validate the login form fields
        $credentials = $request->validate([
            'email' => ['required', 'email'],
            'password' => ['required'],
        ]);

        // try to authenticate the user
        if (Auth::attempt($credentials)) {

            // the user is now authenticated

            $request->session()->regenerate();
            return redirect()->intended('/dashboard');
        }

        // authentication failed, redirect back
        // and display the error message
        return back()->withErrors([
            'login-error' => 'Wrong credentials, please try again.',
        ])->onlyInput('email');
    }

    public function logout(Request $request)
    {
        // log the user out
        Auth::logout();
        // regenerate the session
        request()->session()->regenerate();
        // regenerate the token
        request()->session()->regenerateToken();
        // and redirect to a /login route
        return redirect('/login');
    }
}
Explanation
Our AuthController.php file imports the Auth facade, needed in order to use the framework's authentication utilities:
use Illuminate\Support\Facades\Auth;
Our controller class has three member functions:
showLoginForm()– displays the login page/view.authenticate()– tries to authenticate / log a user in based on the login form's data.logout()– logs a user out and redirects them to a given route.
The attempt() function
Inside our authenticate() controller method, we use the framework's attempt() function to try to authenticate the user with the provided credentials.
The attempt function accepts an array of key/value pairs, represented by our $credentials variable.
The first key/value pair represents a username. In our case, the email field/column is used as a username. The second key/value pair represents a password. The function then compares the user's stored hashed password with a given login's unhashed password.
Note: By default, the attempt function tries to find the user record inside the users table.
If the attempt function can match the login credentials with the existing user record, the function returns true. This means the user was found in the table and is now logged in / authenticated. Then, we redirect the authenticated user to a given route, which, in our case, is /dashboard.
If you want to manually specify the field names for the attempt functions, you could also write:
 if (Auth::attempt([
            'email' => $request->email,
            'password' => $request->password,
        ])) {
            // the user is now authenticated
}
Or:
 if (Auth::attempt([
            'email' => $credentials['email'],
            'password' => $credentials['password'],
        ])) {
            // the user is now authenticated
}
If your authentication depends on several fields, you could list them inside the attempt function call:
 if (Auth::attempt([
            'email' => $request->email,
            'password' => $request->password,
            'other_field' => 'some_value',
        ])) {
            // the user is now authenticated
}
Important: Once the user has been authenticated, we need to regenerate the session for safety reasons via:
$request->session()->regenerate();
If the attempt function cannot match the login credentials with the existing user record, the function fails and returns false. In this case, the user with the provided credentials is not authenticated, and we usually redirect the visitor back to the login page and display an error.
We redirect the user back to the login form and provide the error description using the ->withErrors('login-error' = > 'Informative message.') function call. This function attaches an error message to the session, and is then displayed through the @error('login-error') ... @enderror directive block in our login.blade.php file:
    @error('login-error')
    <div class="error">
        <p>{{ $message }}</p>
    </div>
    @enderror
The onlyInput('email') function call puts only the email value back to the session, so we do not have to re-enter the email value again on the login form. The old email value is retained by using the old() helper function in our login.blade.php view:
<input type="email" id="email" name="email" value="{{ old('email') }}" required>
Logging a user out
Our controller has a third function, we named logout(). This function/method logs the currently authenticated user out using the Auth::logout() function call, regenerates the session and the token and redirects the user to a given route. In our case, we redirect the user back to the /login page.
This controller method is invoked when we click on the Log Out button which submits the POST request to a /logout route.
Note: All logout requests should be done via the POST request.
Checking if a user is authenticated
To check if a user is authenticated, in our controllers and other PHP classes, we would use the following function:
if (Auth::check())
{
    // The user is logged in
}
In Blade templates, we can use the @auth .. @endauth directives to display the code to authenticated users only:
@auth
<p>This is visible only to authenticated users.</p>
@endauth
Defining routes
Let us define the necessary routes. Open the web.php file and paste the following code:
<?php

use App\Http\Controllers\AuthController;
use Illuminate\Support\Facades\Route;

Route::get('/login', [AuthController::class, 'showLoginForm'])->name('login');
Route::post('/login', [AuthController::class, 'authenticate']);
Route::post('/logout', [AuthController::class, 'logout']);

Route::get('/dashboard', function () {
    return view('dashboard');
})->middleware('auth');
This code defines the following routes:
- The
/loginGET route - displays the login form. By attaching the->name('login')helper function, we also gave this route a name. - The
/loginPOST route - handles the login request and tries to log a user in. - The
/logoutPOST route - logs a user out. - The
/dashboardGET route - displays a page accessible only to authenticated users. This route is protected by theauthmiddleware, by attaching the->middleware('auth')expression to our route. The'auth'middleware is a mechanism which ensures that only authenticated users can access the given route, in our case, the/dashboardroute. If a non-authenticated user tries to access this route, the middleware will redirect them to a named'login'route by default, which in our case is the/loginroute.
Testing
To access the login form, in our browser, we enter the http://127.0.0.1:8000/login address:
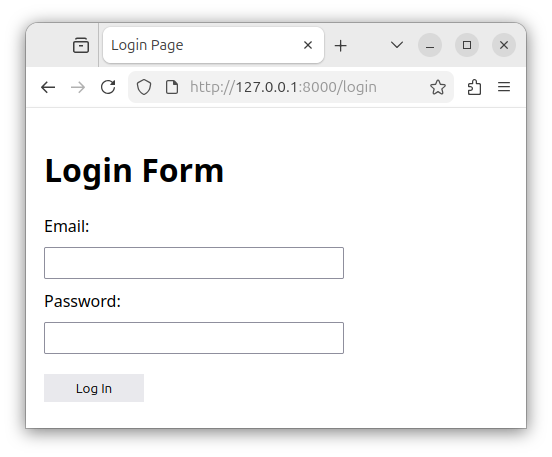
This page displays the login form where we enter the existing user's credentials:
user1@example.com
pass1
And click the Log In button.
The user is successfully authenticated and redirected to the /dashboard page:
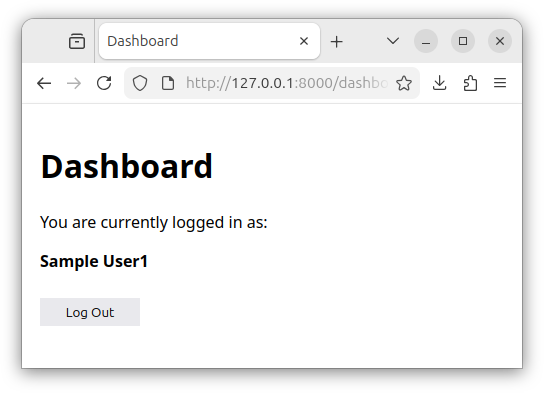
This page displays the user's name and a form with a Log Out button. If we click the Log Out button, the user gets logged out and redirected back to the /login route.
If we enter the wrong credentials in the login form, the framework redirects us back to the login page, displays the error message and the form retains the previously entered email value:
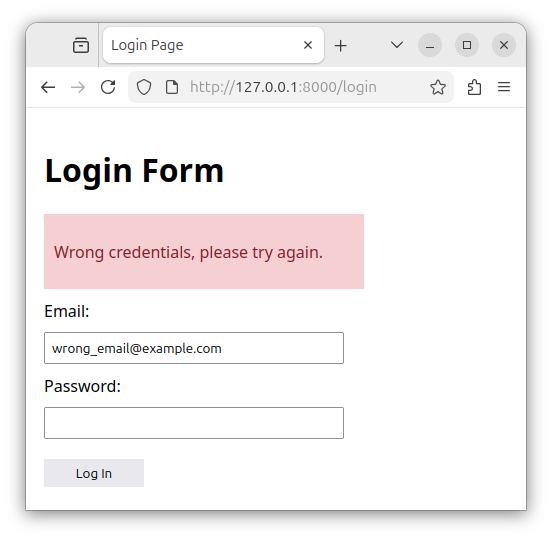
If a user is not logged in and tries to access the /dashboard page, they will be redirected to the /login page. The /dashboard path is protected by the auth middleware and is accessible only by the authenticated users.
Summary
In this tutorial, we learned how to authenticate the user, log a user in and out, check if a user is logged in, and protect access to a route so that only authenticated users can access the route.


