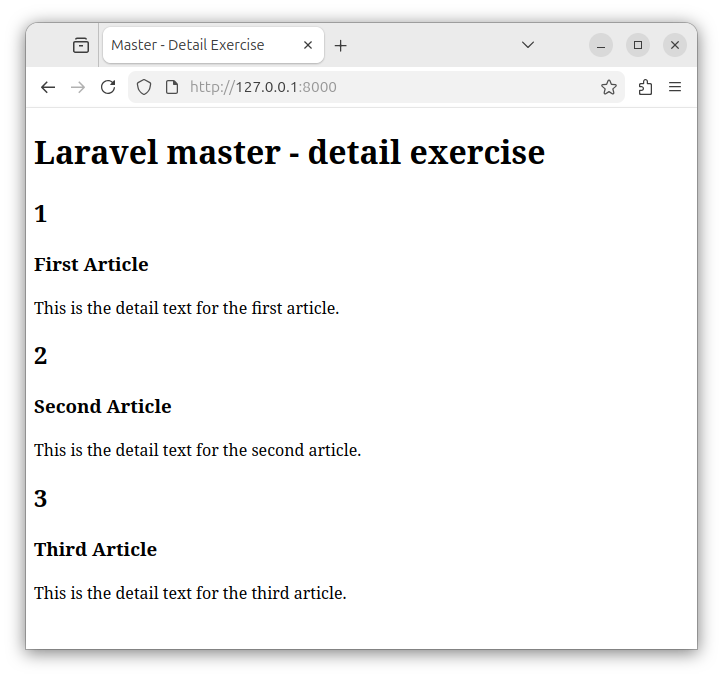
Exercise - Master-Detail Relationship
In this exercise, we will create a Laravel app that utilizes a master-detail relationship. The exercise requirements are:
- Create a master table called articles.
- Create a detail table, called article_details.
- Create models for both tables and represent relationships between tables.
- Use models to retrieve all records.
- Create a view and display the data.
Creating a Laravel project
Create a new Laravel project in the terminal:
laravel new laravel-master-detailWe can go with the default options and choose the MySQL database.
Navigate to the /laravel-master-detail folder and start a local server. Execute both commands:
cd laravel-master-detail
composer run dev
Alternatively, start a simple local server by using the following command:
php artisan serveCreate a master table (articles)
Open a new terminal window. Create a migration file that in turn creates the master articles table:
php artisan make:migration create_articles_tableOpen the newly created migration file whose name ends with the create_articles_table.php wording. Add the title column to our articles table by modifying the existing Schema::create() function:
Schema::create('articles', function (Blueprint $table) {
    $table->id();
    $table->string('title');
    $table->timestamps();
});
Create a detail table (article_details)
Now, we will create a detail table that will hold the lengthy text for each record in the master articles table. In a terminal, create a migration that in turn creates the article_details table:
php artisan make:migration create_article_details_tableOpen the newly created migration file that ends with the create_article_details_table.php wording. Modify the Schema::create() function and add two additional columns.
The first additional column will be the article_id foreign key for the articles table, and it will be constrained on the database level.
The second additional column will be the article_text column which will hold the lengthy text for each record inside the articles table. The complete Schema::create() function now looks like:
Schema::create('article_details', function (Blueprint $table) {
    $table->id();
    $table->foreignId('article_id')->constrained();
    $table->text('article_text');
    $table->timestamps();
});
Running the migrations
To create these two tables, we run the migrations in a terminal:
php artisan migrate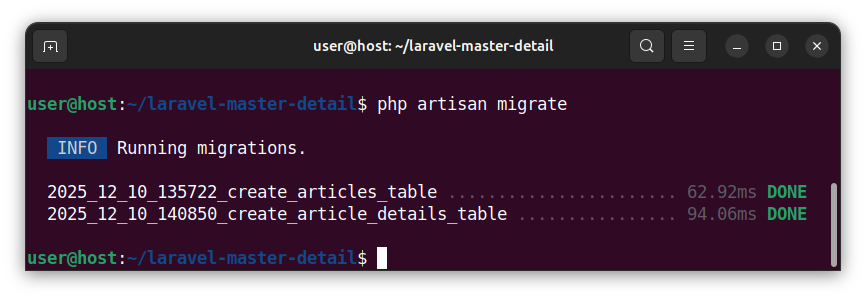
Inserting sample records
To quickly insert a few sample records in both the articles and the article_details tables, we start the tinker tool in a terminal:
php artisan tinkerAnd paste and execute the following code:
DB::table('articles')->insert([
	['title' => 'First Article', 'created_at' => now(), 'updated_at' => now()],
	['title' => 'Second Article', 'created_at' => now(), 'updated_at' => now()],
	['title' => 'Third Article', 'created_at' => now(), 'updated_at' => now()],
]);

DB::table('article_details')->insert([
	['article_id' => 1, 'article_text' => 'This is the detail text for the first article.', 'created_at' => now(), 'updated_at' => now()],
	['article_id' => 2, 'article_text' => 'This is the detail text for the second article.', 'created_at' => now(), 'updated_at' => now()],
	['article_id' => 3, 'article_text' => 'This is the detail text for the third article.', 'created_at' => now(), 'updated_at' => now()],
]);

exit;
Creating Models
Now, we will create two models, one for each table, and specify relationships between the two tables.
Create an Article model
To create an Article model that represents the articles table, in the terminal, we write:
php artisan make:model ArticleThis command creates the app/Models/Article.php file that has an Article model class. This class is automatically associated with the articles table.
Create an ArticleDetail model
To create an Article_Detail model that represents the article_details table, in the terminal, we run the following command:
php artisan make:model ArticleDetailCreating relationships
The articles and article_details tables have a one-to-one relationship.
Create a relationship inside the Article model
Each record inside an articles table has one related record inside the article_details table. To create this "Has One" relationship, we open the app/Models/Article.php file and paste the following code:
<?php

namespace App\Models;

use Illuminate\Database\Eloquent\Model;
use Illuminate\Database\Eloquent\Relations\HasOne;

class Article extends Model
{
    // define a has-one relationship:
    public function detail() : HasOne
    {
        return $this->hasOne(ArticleDetail::class);
    }
}
This code defines a HasOne relationship from the perspective of the master articles table towards the article_details table which acts as a detail table. It is used to fetch the records from the detail table. The relationship is defined inside the public method we named detail(). The framework automatically assumes there will be a foreign key in the article_details table with the name of articles_id, which indeed is the case.
Create a relationship inside the ArticleDetail model
Each record inside an article_details table belongs to one related record inside the articles table. To create this "Belongs To" relationship, we open the app/Models/ArticleDetail.php file and paste the following code:
<?php

namespace App\Models;

use Illuminate\Database\Eloquent\Model;
use Illuminate\Database\Eloquent\Relations\BelongsTo;

class ArticleDetail extends Model
{
    // define the belongs-to relationship
    public function article() : BelongsTo
    {
        return $this->belongsTo(Article::class);
    }
}
This code defines a belongs-to, one-to-one relationship from the perspective of the detail, article_details table towards the master, articles table. The relationship is defined inside a public member function we named article().
Fetch records using a relationship
Now, we can use the Article model with a relationship to fetch records from the articles table together with the related records from the article_details table. Open the web.php file and paste the following code:
<?php

use App\Models\Article;
use Illuminate\Support\Facades\Route;

Route::get('/', function () {
    $myArticles = Article::with('detail')->get();
    return view('articles', ['myArticles' => $myArticles]);
});
This code defines an index route and uses the Article class with a relationship to fetch all the records from the articles table together with the related records from the article_details table. Then, it passes the collection of fetched records, called, $myArticles to our, yet to be created, articles view.
Create a view
Finally, we create a view, a blade template file that contains the HTML code for our page. On the command line, we write:
php artisan make:view articlesThis command creates a resources/views/articles.blade.php template file. Open the file and paste the following code:
<!DOCTYPE html>
<html lang="en">
<head>
    <meta charset="UTF-8">
    <meta name="viewport" content="width=device-width, initial-scale=1.0">
    <title>Master - Detail Exercise</title>

</head>
<body>
<h1>Laravel master - detail exercise</h1>
    @foreach($myArticles as $myArticle)
        <h2>{{ $myArticle->id }}</h2>
        <h3>{{ $myArticle->title }}</h3>
        <p>{{ $myArticle->detail->article_text }}</p>
    @endforeach

</body>
</html>
This code will be compiled into a final HTML output. The code uses the @foreach loop to iterate over the entire collection of fetched records. Individual articles table columns are displayed using the {{ }} blade echo statements. Column values from the article_details table are fetched through the detail relationship.
Display records in a browser
Finally, if we access the http://127.0.0.1:8000 local address, we see the following output in our browser window: