Passing a Single Variable to a Template in Laravel
In our previous tutorial, we learned how to return a template that has hard-coded, fixed HTML code.
In this tutorial, we will learn how to pass a single variable to a template and display the value of this variable.
Using the view() function to pass a variable
We can pass variables/data to our template file, using the view() function. The view() function can accept a second parameter which is an array of key => value pairs.
To pass a single variable to our template, we use the following view() function call syntax:
view('template-name', ['variableName' => 'Variable value']);Passing a variable and returning a view
Finally, we return this view using the following code in our web.php file:
<?php

use Illuminate\Support\Facades\Route; // import the Route facade

Route::get('/', function () {  // define a route
    return view('myview', ['myVar' => 'Sample variable value']);  // return a view and pass a variable with some data to this view
});
We can also pass in a copy of another variable's value, but still retain the myVar variable name:
<?php

use Illuminate\Support\Facades\Route; // import the Route facade

Route::get('/', function () {  // define a route
    $someVar = 'Sample variable value';
    return view('myview', ['myVar' => $someVar]);  // return a view and pass a variable with a copy of another variable's value
});
Using a variable in a template
Let us manually create an empty template file, called myview.blade.php, and place it inside the resources/views folder. Alternatively, use the following artisan command to create a template file:
php artisan make:view myviewOpen the myview.blade.php template file and paste the following HTML code:
<!DOCTYPE html>
<html lang="en">

<head>
    <meta charset="UTF-8">
    <meta name="viewport" content="width=device-width, initial-scale=1.0">
    <title>Passing a variable in Laravel</title>
</head>

<body>
    <h1>The variable value is:</h1>
    <h2>{{ $myVar }}</h2>
    <p>This value is now part of the HTML page.</p>
</body>

</html>
The Blade echo statement {{ }}
Our template now contains the HTML code and a special Blade's echo directive represented by double curly braces {{ }}. The Blade's echo directive is used to display the data inside the double curly braces.
To display the value of our myVar variable in our template, we place the $myVar variable name inside the {{ }} echo directive, so that it now looks like the following:
{{ $myVar }}The {{ $myVar }} echo template directive outputs the escaped value of our variable. Internally, everything inside the {{ }} directive gets passed through the htmlspecialchars() function and we get the escaped output by default. Finally, we see the HTML output in our browser:
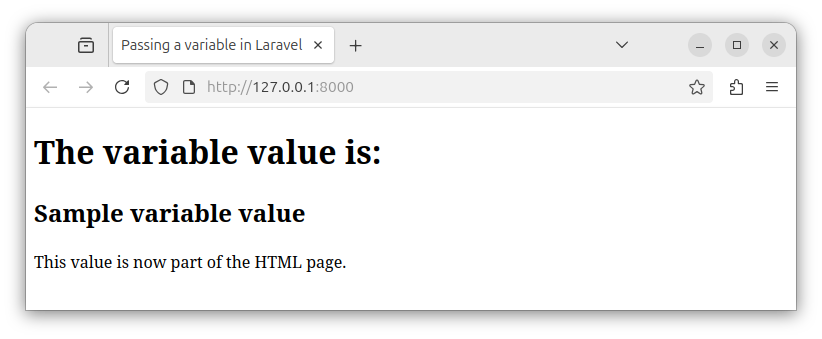
Here, we opted to use the variable as a value for our h2 heading:
<h2>{{ $myvar }}</h2>The following image shows that the template code gets compiled into a final HTML output:
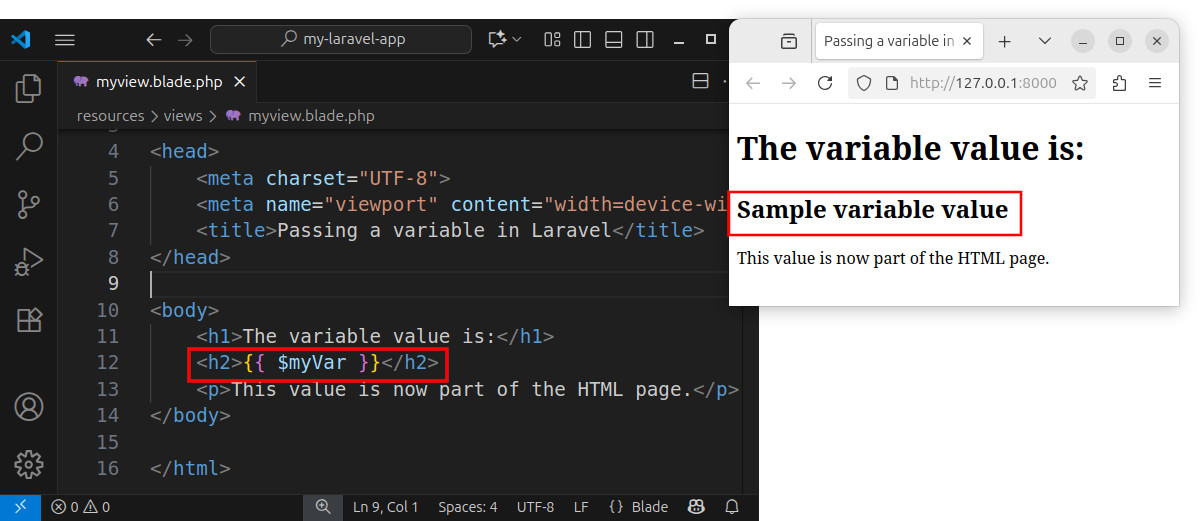
The echo directive {{ $some_variable }} can be placed anywhere in our HTML.
To display the unescaped content, we can use the {! !} directive, but we need to be careful with this directive as the unescaped HTML content poses a security risk and should be used with caution. Most of the time, we want the output to be escaped, so we use the more secure {{ }} echo directive.
Echo directives as placeholders for data
You can think about the {{ }} directive as a placeholder for a variable within a broader HTML page. And when the template gets compiled, the placeholder becomes an actual value and gets embedded in the rendered HTML output.
In the next tutorial, we will learn how to pass multiple variables to our template.


