Validating Data
In this tutorial, we will learn how to validate the form's fields on the server side. We will use Laravel's validate() method to validate the form's fields sent over the POST request. We validate the data before inserting, updating, or deleting the record.
Defining routes
We will define two routes:
- The GET route, used to display the form - 'articles/create'.
- The POST route, used to validate the form's data - '/articles'.
In a Laravel app, open a web.php file and paste the following code:
<?php

use App\Http\Controllers\ArticleController;
use Illuminate\Support\Facades\Route;

Route::get('/articles/create', [ArticleController::class, 'create']);
Route::post('/articles', [ArticleController::class, 'store']);
Code explanation
The above code defines two routes, one for the GET request and one for the POST request. Different controller methods are used to handle these routes. The following line includes the ArticleController controller/class, which we will create later:
use App\Http\Controllers\ArticleController;The Route::get() function call defines the '/articles/create' GET route and executes the controller's create method for this route. This route is used to display an HTML form.
Route::get('/articles/create', [ArticleController::class, 'create']);The Route::post() function call defines the '/articles' route and executes the ArticleController's store method when the form sends a POST request to this route. For now, we will only validate the data when a POST request is made. In this tutorial we will not insert or update the record, we will only validate the form's data on the server side.
Route::post('/articles', [ArticleController::class, 'store']);There are now two different requests in our web.php file, the GET and the POST request. The Route::get function specifies the code to be executed for the GET request and the Route::post function specifies the code to be executed for the POST request to this route.
As an example, the GET request is sent when we type the address in a browser and press enter. The POST request is sent when we click on the form's Submit button and the form sends the POST request.
Creating a view
To create a view that stores the HTML code and displays the form, in the terminal, we execute:
php artisan make:view form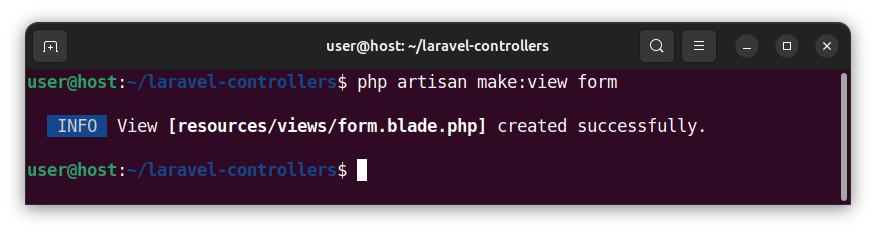
Open the newly created form.blade.php file, paste the following HTML code, and save the file:
<!DOCTYPE html>
<html lang="en">
<head>
  <meta charset="UTF-8">
  <title>Validating a Form in Laravel</title>
  <style>
    body { font-family: Arial, sans-serif; padding: 10px; }
    form { max-width: 500px; display: flex; flex-direction: column; gap: 10px; }
    input, textarea, button { padding: 8px; }
    textarea { height: 150px; }
    button { margin-top: 5px; border: none; cursor: pointer; width: 100px; }
  </style>
</head>
<body>
  <h2>Submit an Article</h2>
  <form action="/articles" method="POST">
    @csrf
    <label for="title">Title:</label>
    <input type="text" name="title">
    <label for="article_text">Article Text:</label>
    <textarea name="article_text"></textarea>
    <button type="submit">Submit</button>
  </form>
</body>
</html>
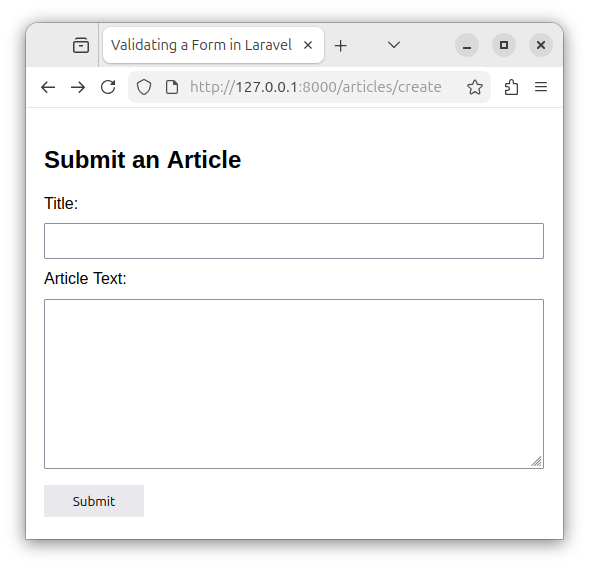
This code contains a simple HTML page that displays a form. The form can be used to insert a new article record in a table. The form has the title field, the article_text field and a Submit button. The form's action method is POST, and the form submits its data to the '/articles' route via the POST HTTP request.
Also, to protect our app from the cross-site request forgery or the CSRF, we add the @csrf Blade directive to our form. This directive generates a hidden token field which is then used by the framework to prevent the CSRF attacks. In short, always include the @csrf Blade directive in a form if your form sends POST, PUT, PATCH or DELETE requests.
Creating a controller
Let us create an ArticleController class/controller that will store the code for displaying and validating the form. In the terminal, we write:
php artisan make:controller ArticleController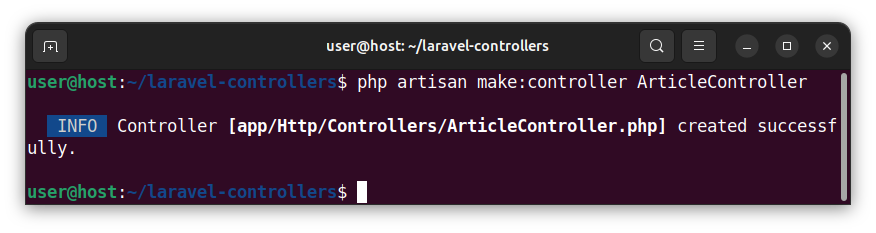
Open the newly created ArticleController.php file and paste the following code:
<?php

namespace App\Http\Controllers;

use Illuminate\Http\Request;

class ArticleController extends Controller
{
    public function create() // used for the /articles/create route
    {
        return view('form'); // return a view containing the form
    }

    public function store(Request $request) // used for the POST request to the /articles route
    {
        // use the validate() method to
        $validated = $request->validate([ // validate the data using the following rules:
            'title' => 'required', // validate the title field against the 'required' rule
            'article_text' => 'required' // the 'article_text' field is also required
        ]);
        // if the validation is successful, return an array of validated data
        // and execute any code that follows
        dd('Validation successful!', $validated); // for example, dump the data and stop the execution
    }
}
The controller class has two methods, create and store. The create method will be invoked when we send a GET request for the '/articles/create' route. This method returns a view (a Blade template) that contains the HTML code and the form as in the following image:
The store method is called when the POST request is sent to the '/articles' page. This happens when we submit the form, and the form sends a POST request to the '/articles' route. This method is used to validate the form's data/fields passed to the '/articles' route via the POST request.
The validate() method
The store method accepts a single parameter we named $request. This parameter is of the Illuminate\Http\Request type. The Illuminate\Http\Request object has the validate() method which accepts one or more validation rules to be applied to fields. For example, if the title field is the required field, then, inside the validate() method, we pass in the required rule for this field. If the article_text field is required, we validate it against the required rule too:
$validated = $request->validate([ // validate the data using the following rules:
     'title' => 'required', // validate the title field against the 'required' rule
     'article_text' => 'required' // the 'article_text' field is also required
]);
Applying multiple validation rules
To apply multiple validation rules to a field, we separate the validation rules with a | character. For example, if the field is both required, and must be a string, we write:
$validated = $request->validate([ // validate the field using the following rules:
     'title' => 'required|string', // the title field is required and must be a string
     'article_text' => 'required|string', // the article_text field is required and must be a string
]);
Alternatively, we can use a different syntax where we provide rules as comma-separated values in an array:
$validated = $request->validate([ // validate the field using the following rules:
     'title' => ['required', 'string'], // the title field is required and must be a string
     'article_text' => ['required', 'string'], // the article_text field is required and must be a string
]);
If the validation is successful
If the validate() method is successful, it returns an array of validated data which we can store in some $validated variable. This array has the following format:
[
    'field_name1' => 'Some value 1',
    'field_name2' => 'Some value 2',
]
The framework then continues executing any statements that might follow after the validate() statement. In our case it is a simple dd() (also known as "die and dump") function that outputs the simple message, a content of the $validated array and stops the script's execution.
dd('Validation successful!', $validated); // print the $validated data and stop the script's execution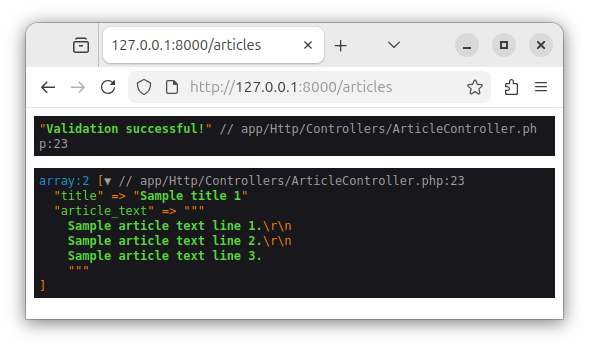
Important: In production, after the call to the validate() method, instead of having the dd() method, you usually want to insert(or edit or delete) a record and then redirect a user to a specific route.
Note: The dd($var1, $var2, $var3) function is a convenient way to quickly inspect the variables' values and stop any further script execution.
If the validation fails
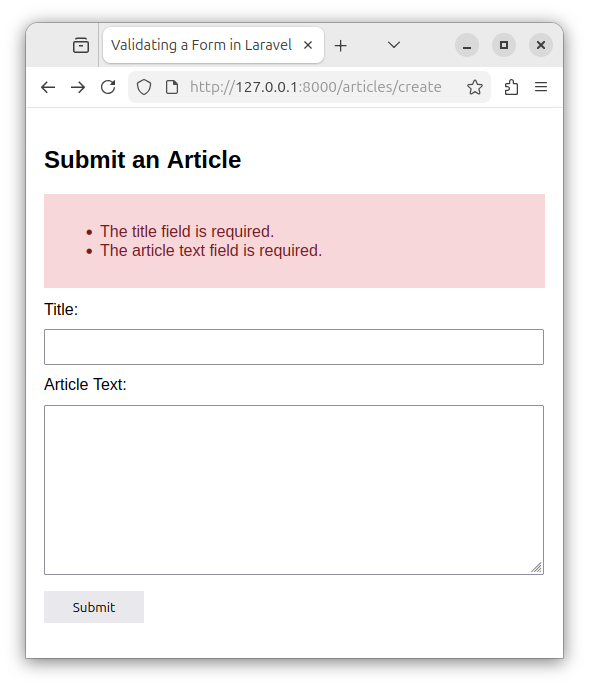
If the validate() method fails (the validation is not successful / the fields do not fulfill the validation requirements), the validate() method: raises an exception of an internal type and redirects the user to their previous position/route. In our case it would be the '/articles/create' route.
Displaying errors
When redirecting, the framework will also provide an $errors variable which contains a collection of errors. This variable is available to all the views in our application and is of the underlying internal Illuminate\Support\MessageBag type.
To check if the $error object contains any errors, we can use the any() method:
@if($error->any())
{{-- Display the errors --}}
@endif
To get an array of all error messages inside the $errors object, we utilize the all() method:
@foreach ($errors->all() as $error) {{-- Loop through the errors array --}}
    <p>{{ $error }}</p> {{-- And display all the errors  --}}
@endforeach
We can insert the following snippet into the existing form.blade.php code to display the list of all errors back to the user:
  @if ($errors->any()) {{-- Check if there are any errors --}}
        <ul>
            @foreach ($errors->all() as $error) {{-- Loop through the errors collection --}}
                <li>{{ $error }}</li> {{-- And display all the errors  --}}
            @endforeach
        </ul>
  @endif
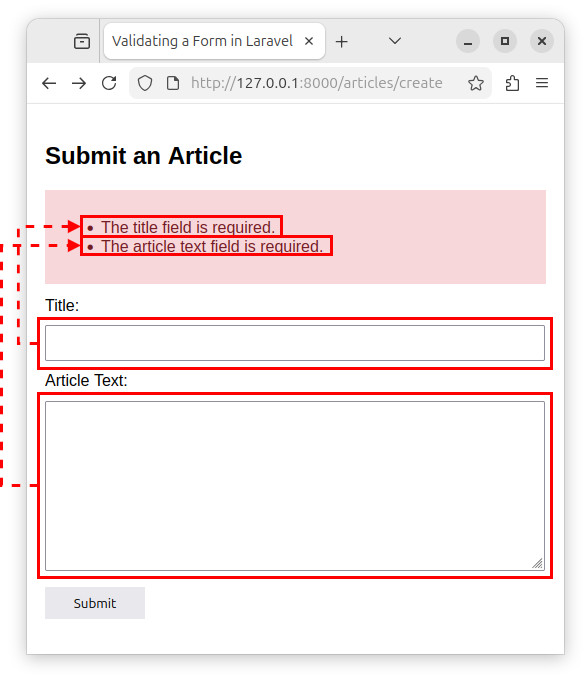
You can place this code snippet above your form's code. Depending on which CSS styling you applied to the above code snippet, you might see error messages that resemble the ones in the following picture:
Widely used validation rules
The following is a list of some of the most-widely used validation rules.
required
The required validation rule states that the field being validated is required and must not be empty. If we do not provide value for a field that is required, the validation() method fails, raises an internal exception and redirects the user to a previous page.
string
The string validation rule says that the field being validated must be a string.
min:value
This rule says a field must have a minimum value. If the field is a string, then it must have a minimum number of characters.
max:value
The field being validated must have a value that is less than or equal to the maximum value. For a string, the rule specifies the maximum allowable number of characters a field value can have.
numeric
The field being validated must be a numeric value.
unique:table_name,column_name
The field's value must not already exist in a given table_name. The column_name parameter is optional. If the column_name is not specified, the framework will use the field's name as a column name.
date
The field must be a valid date.
Summary
In this tutorial we learned how to use the validate() method to check the fields values against various validation rules. We also learned how to define a POST request route using the Route::post() function call, use the form's data and display error messages back to the user. In our next tutorial, we will learn how to insert the record using the validated data.


