Exercise - Using Subviews in Laravel
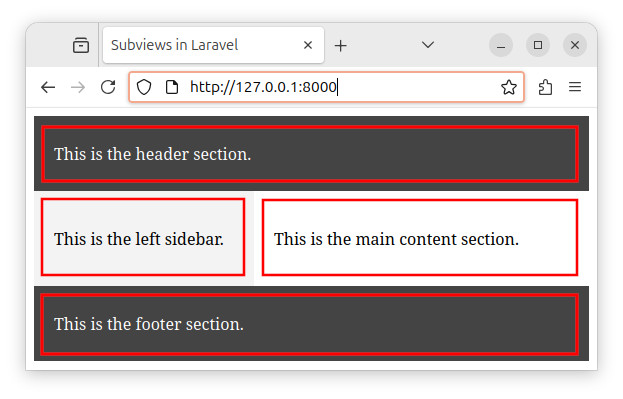
In this exercise, we will divide our HTML page into one main view and several subviews. Then, we will include the subviews in the main view and display the page in a browser.
Exercise text
In a Laravel application, create a view that holds the entire HTML code for our page. The web page will have the following sections:
- Header
- Left sidebar
- Main content
- Footer
Divide the HTML code into one main view and several subviews. Each section will go into a separate subview, a separate template file.
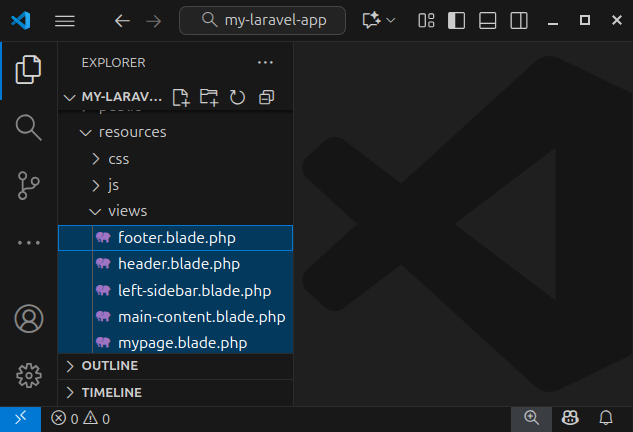
- The header section goes into the header.blade.php file.
- The left-sidebar section can go to the left-sidebar.blade.php file.
- The main content section will be placed inside the main-content.blade.php file.
- The footer section will go to the footer.blade.php file.
Finally, include all the subviews in the main view and display the page in a browser.
Creating a route
Inside our web.php file, we define a route and return a view (a template). The source code for the web.php file is:
<?php

use Illuminate\Support\Facades\Route; // import the Route facade

Route::get('/', function () { // define a route
    return view('mypage'); // return a view
});
Creating a template
Using the artisan tool, create a new template file using the following command:
php artisan make:view myviewOpen the newly created mypage.blade.php file and paste the HTML code that has several sections:
<!DOCTYPE html>
<html lang="en">

    <head>
        <meta charset="UTF-8">
        <meta name="viewport" content="width=device-width, initial-scale=1.0">
        <title>Subviews in Laravel</title>
        <style>
            #header,
            #footer {
                background-color: #444;
                color: #fff;
                padding: 10px 20px;
            }

            .container {
                display: flex;
            }

            #left-sidebar {
                width: 180px;
                background-color: #f3f3f3;
                padding: 20px;
            }

            #main-content {
                flex-grow: 1;
                padding: 20px;
            }
        </style>
    </head>

    <body>
        <div id="header">
            <p>This is the header section.</p>
        </div>

        <div class="container">
            <div id="left-sidebar">
                <p>This is the left sidebar.</p>
            </div>
            <div id="main-content">
                <p>This is the main content section.</p>
            </div>
        </div>

        <div id="footer">
            <p>This is the footer section.</p>
        </div>
    </body>

</html>
Currently, the entire HTML code for our page resides in a single file. We will divide parts of this HTML code into separate template files called subviews.
Creating subviews
We will divide our HTML page into several subviews and create several template files.
The header subview
Create a new template file that will hold the header section of our HTML code. In the terminal, we write:
php artisan make:view headerThis command creates a template file, called header.blade.php and places it inside the resources/views folder. Open the header.blade.php file and paste the header HTML code:
        <div id="header">
            <p>This is the header section.</p>
        </div>
Creating a subview for the left sidebar
Then, we create the template file that will hold the left-sidebar code by executing the following command:
php artisan make:view left-sidebarWe open the newly created left-sidebar.blade.php file from the resources/views folder and paste the following HTML code:
            <div id="left-sidebar">
                <p>This is the left sidebar.</p>
            </div>
Creating a subview for the main content
Let us create a template file that will hold the HTML code for the main content:
php artisan make:view main-contentOpen the newly created main-content.blade.php template file from the resources/views folder and paste the following HTML code:
             <div id="main-content">
                <p>This is the main content section.</p>
            </div>
The footer subview
Finally, we create a template file (a subview) that holds the HTML code for the footer section. Execute the following artisan command using a shell:
php artisan make:view footerOpen the footer.blade.php file from a resources/views folder and paste the following HTML code:
        <div id="footer">
            <p>This is the footer section.</p>
        </div>
Including the subviews
Now, we include all these subviews in our main view using multiple @include statements. We modify/overwrite the content of our mypage.blade.php file by pasting the following code into it:
<!DOCTYPE html>
<html lang="en">

    <head>
        <meta charset="UTF-8">
        <meta name="viewport" content="width=device-width, initial-scale=1.0">
        <title>Subviews in Laravel</title>
        <style>
            #header,
            #footer {
                background-color: #444;
                color: #fff;
                padding: 10px 20px;
            }

            .container {
                display: flex;
            }

            #left-sidebar {
                width: 180px;
                background-color: #f3f3f3;
                padding: 20px;
            }

            #main-content {
                flex-grow: 1;
                padding: 20px;
            }
        </style>
    </head>

    <body>

        @include('header')

        <div class="container">
            @include('left-sidebar')

            @include('main-content')

        </div>

        @include('footer')

    </body>

</html>
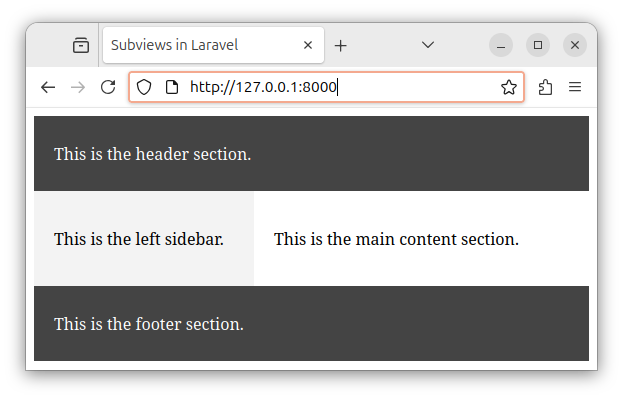
Now, our mypage.blade.php template file serves as the main page wrapper and includes all the subviews. Now, in place of previous hard-coded HTML sections, we have the @include statements that get the content from the subviews.
If we open the local address in our browser, we see the following output.
Summary
In this exercise, we practiced dividing our HTML page into one main view and multiple subviews.
Note: you can name your template files differently, according to your needs.
Then, we included all subviews in a main view. This way, we can organize complex HTML code into more manageable, reusable segments.


